Natural gas meter installation tips for diaphragm meters
The diaphragm meter is a standard or traditional gas meter used in residential and light commercial applications. Here, I share tips on installing Itron natural gas diaphragm meters.
Need assistance with a gas flow meter?
Natural Gas Meter Installation
The meter installation must comply with local building and safety codes and state and federal regulations, including Title 49 of the Code of Federal Regulations, which suggests that each meter be easily accessible for reading, inspection, maintenance, or replacement. The meter should be protected from corrosion through electrical isolation and other damage, whether installed inside or outside. Additionally, the meter must be well-ventilated and more than three feet away from any ignition or heat source.
Pre-installation tips:
- Diaphragm meters are not recommended for use below -30°F or above 120°F.
- Meters read flow positively in one direction, which is marked on the meter casting “inlet.”
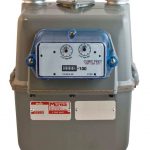
- Before installation, ensure that the meter will satisfy the application’s requirements. The maximum allowable operating pressure (MAOP) and flow rate capacity are marked on the meter badge.
- Verify that the swivel flanges are in the same plane and will not strain on the meter when the nuts are tightened.
- Blow out the service lines to clean them and ensure that no debris flows into the meter when the gas is flowing.
- The meters should be shipped, stored, and installed upright, and the manufacturer’s dust caps should remain attached to the inlet and outlet connections until the meter is installed.
 Installation tips
- If you suspect that the gas supply will be dirty, install a filter or strainer on the inlet side of the meter.
- The gas meter should be installed as close to level as possible, never at the low point, because liquids may become trapped there.
- Place the connection washer on each swivel pilot. Support the meter so both hubs are against the connection washers, and hand-tighten the connection nuts. Then, alternately tighten the nuts to an appropriate torque for the connection size. Do not overtighten, as it can damage the connection washer/gasket.
- Avoid excessive stress on the meter and connecting pipe.
- A meter should not be buried or come into contact with soil, mulch, or concrete walls. The corrosive elements of the soil and mulch and the alkali content in the concrete can stimulate premature corrosion and cause a gas leak.
Meter start-up tips
- In any new installation, before turning the gas on, check the pipe to verify the connections are leak-free. If a downstream valve is present, close the valve.
- To avoid high differential pressure across the meter, which can damage the internal components, crack open the upstream and downstream valves very slowly for a few seconds. Then, slowly turn each valve to ¼ turns and then slowly turn to full open.
- In a high-pressure line, if isolated gas is downstream of the meter and the outlet valve is opened first, the meter could be damaged in a “reverse stop.” For this reason, it is recommended that installers pressurize the meter with the inlet valve so the meter runs forward.
- After the meter is pressurized, check for leaks by applying leak detection soap or using other gas leak detectors.
- Natural gas meter types: Inferential and Positive Displacement Meters
- Gas metering instrumental in early gas distribution success


Hi Susan,
I am very glad to find your wonderful blog. You have mentioned more helpful tips for natural gas meter installation. Really, these are more helpful. Also, related posts are more effective. Thanks for your helpful blog.
Nice Blog!! The content you have shared is very elaborative and informative. Thanks a lot for sharing such a great piece of knowledge with us.
Hi! Does anyone have any idea why gasmeters has always inlet and outlet on top?